How to install AvePoint's DocAve 6 suite
- Maarten Boonen
- Aug 7, 2014
- 4 min read

Welcome to my first post about AvePoint's brilliant DocAve 6 suite. After surfing the web I discovered there is not a lot of documentation around. This will be a series of posts on how to configure DocAve 6 and enjoy all the wonderful features provided by AvePoint.
I will start with the installation of DocAve 6 itself in a step-by-step detailed manor. Although I presume you have more peanuts in your brain than a monkey.
Nessesities
Service Account
DocAve 6 software
SilverLight
Server with minimum specs of 2 CPU and 2 or 4 GB memory
Access to a SQL Enterprise (2008 R2 >> up) server (for RBS)
Coffee
Resources
Binarie installation
Before I can start the actual installation I need to configure somethings.
Service Account
The Service Account can be a normal domain user and need to have a minimum of the following permissions. See DocAve 6 Installation guide page 9 for more details.
Local System
Add to the BUILTIN\Administrators group on all servers.
IIS_IUSRS (local system) done by DocAve.
Performance Monitor Users (local system) done by DocAve.
Logon as a batch job (local system policy, gpedit.msc) done by DocAve.
SQL Server
Add to SQL with a Sys admin role (more than needed see the user guide).
SharePoint
Add to the Farm Administrators group of all your farms.
All Web Applications user permissions with full control (Do not check, Account operates as System).
Managed Metadata Service Application >> Term Store Administrator.
User Profile Service Application user permissions with full control, Create Personal sites, Follow people and Edit Profile, use Tags and Notes.
Business Data Connectivity Service >> Full Control.
Search Service Application >> Full Control.
Firewall
The following ports need to be opened on the servers. Disabling your firewall is also an option but not recomended.
#Add FireWall rules for DocAve 6 (Only on the SharePoint, OWA and WorkFlow servers)
Write-Host "Add FireWall rules DocAve 6" -ForegroundColor Blue
netsh advfirewall firewall add rule name="DocAve 6 Control Server - 14000" dir=in action=allow protocol=TCP localport=14000
netsh advfirewall firewall add rule name="DocAve 6 Media Server - 14001" dir=in action=allow protocol=TCP localport=14001
netsh advfirewall firewall add rule name="DocAve 6 Media Server - 14002" dir=in action=allow protocol=TCP localport=14002
netsh advfirewall firewall add rule name="docAve 6 SharePoint DocAve Report Service - 14003" dir=in action=allow protocol=TCP localport=14003
netsh advfirewall firewall add rule name="DocAve 6 Agent Service - 14004" dir=in action=allow protocol=TCP localport=14004
netsh advfirewall firewall add rule name="DocAve 6 Control Server - 14007" dir=in action=allow protocol=TCP localport=14007
#Add FireWall rules Snap Manager for SQL (Only on the SQL severs)
Write-Host "Add FireWall rules Snap Manager for SQL" -ForegroundColor Blue
netsh advfirewall firewall add rule name="SnapManager for SQL Control Server - 808" dir=in action=allow protocol=TCP localport=808
Windows Features
.NET Framework 3.5 SP1
Internet Information Server
Anti Virus
Add the …\AvePoint\DocAve6 directory to your anti-virus software’s exclusion list.
Start the installation
Open the location of your installation media and double click, setup.exe


Enter some customer information.

Accept the license agreement.
Choose the installation location. Best to leave it on the C:\ drive.

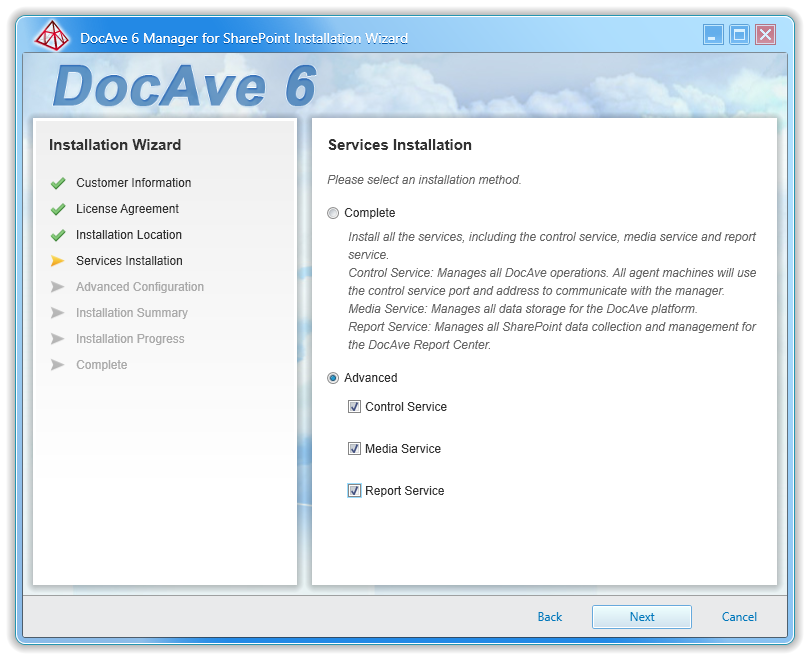
Choose advanced for a detailed installation and select all options.
The install wizard scans the server if it matches his needs.
Warnings are acceptable as long as you know why he's say it.
In my case I used 1 CPU and 2 GB memory. 2 CPU and 4 GB where recommended specs.
If the Net.Tcp Port Sharing Service gives a status failed you have to activate the Windows Service. Go to: Run >> Services.msc >> Find the Net.Tcp Port Sharing Service Put it on automatic and start the service.

Add the information for your orchastrator server.
HOSTNAME will be the name of the server itself.
DOMAIN is the name of your own domain.
Double check if the firewall ports are set correctly.
Specify the service account including the DOMAIN\serviceaccount

Note, the Service Account needs to have the correct permissions in SQL to create databases.

Set a Passphrase which is needed to add agents to the orchestrator. This can be changed from the Control Panel.

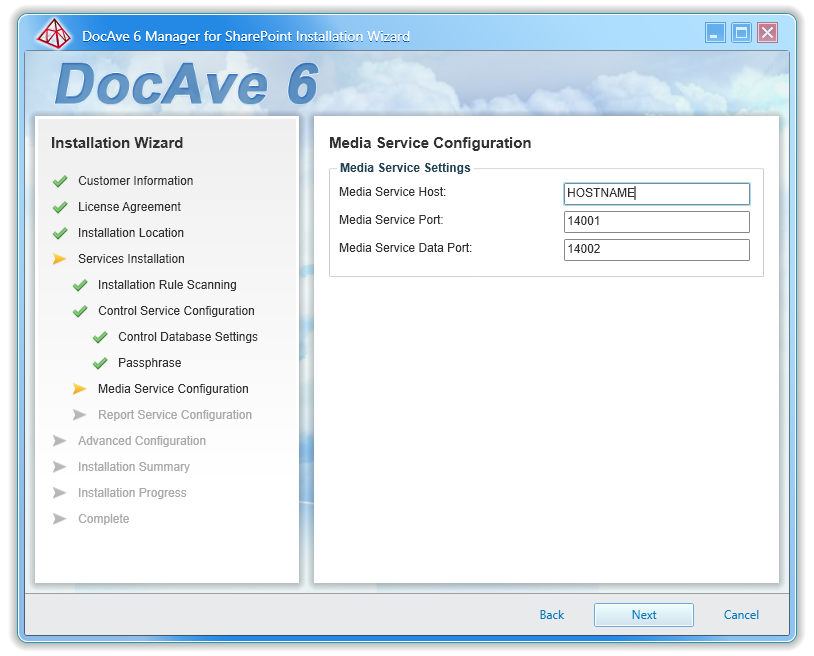
Install the Media Services on the same server. Fill out the hostname of the server your installing DocAve to.
Install the Report Services on the same server. Fill out the hostname of the server your installing DocAve to.

The Report Services database will be created

The Auditor database will be created

You can use a bought or wildcard SSL certificate.
Depending on your security policy in your company you can leave it on the builtin certificate.

Installation summary

The installation is in progress

The installation is completed

When you double click the DocAve icon on your desktop your presented with a SSL certificate security warning.
Note, You can Continue and install the certificate on the local machine to prefent this warning.

Select Certificate on the end of the address bar and choose View certificate.

Install the certificate


Now next time you start DocAve 6 the SSL warning will not be showed.
In order for DocAve to run on the machine SilverLight need to be installed. If it's not pressent a pop-up will present itself.
If you cannot download it you have to disable the IE Enhanced Security Configuration.

Login with the default username and password, admin / admin.

Now the installation is finished and you need to install the agents on all servers within your SharePoint envirionment. this includes Office WebApps and SQL.
In the following posts I'll descibe some configuration settings.


Comments